Monday 14 January 2013

Kawaii Clay Poop Jewelry

The day I came across little poop charms, I thought "Ooooo how darling!" and then add a cute little kawaii face on it? Now that is just adorable! Hahahaha

Available at my Etsy shop!


There are two different types of people

1) "Ewwww!! Who would wear that--that is gross!"

2) "Oooo now that is CUTE!!"

I'm hoping there are more of the latter, hahaha, because I do well with Poo jewelry!

(You can purchase this guy here)


So I hope you like these cute little guys. Let me know in the comments below if you'd like to see other things like this!!

Rachael

Sunday 13 January 2013

DIY Baking Soda Face Wash

There is nothing quite like having a nice, deeply cleaned face. This recipe leaves your face feeling cleansed and so smooth! Topped with a nice moisturizer, and I call that a good time! So here we go!

I can't remember where I got this idea from (somewhere on pinterest of course, hahaha where else does stuff come from?)


2 Tsp Baking Soda
4-6 drops of water (or until a smooth liquid)
Small dish

Mix the baking soda and water together in a dish, with your fingers is fine, and then spread it on your face. Using circular motions, gently massage it in--you don't need to go crazy though!

Rinse with warm water. Make sure you rinse thoroughly so there is no baking soda left on your face--it takes quite a bit to get it off.

Top with your choice of face moisturizer and you're good to go!

Enjoy and let me know how it goes!

Rachael

Tuesday 20 November 2012

Free Chunky Crochet Cowl Pattern


Available for sale in my Etsy Shop

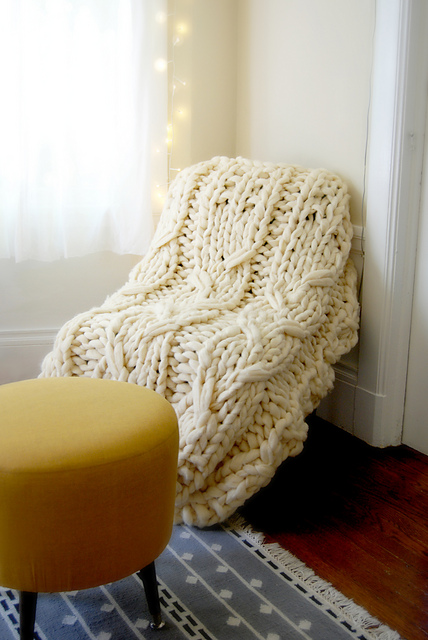
Very versatile cowl. Can be buttoned up many ways to accommodate different personal styles.

Loops and threads Country Loom, super bulky 6

Color A: Warm Cream
Color B: Kiss Me

Crochet needle size N, 13 US, 9mm

Used approximately 175 yards of each color (so around 350 yards total).

ch = chain
sc = single crochet
dc = double crochet
fpdc = front post double crochet
bpdc = back post double crochet

(for explaination of how to do fpdc and bpdc, go to http://www.dummies.com/how-to/content/how-to-work-frontpost-doublecrochet-stitches.html  http://www.dummies.com/how-to/content/how-to-work-backpost-doublecrochet-stitches.html)

ch 35

row 1: 1 dc in 3 chain from hook. 1 dc in each chain across. 32 dc's. chain 2

row 2: 1 bpdc in the first dc post, (1 fpdc in each of the next 4 posts. 1 bpdc in each of the next 4 posts) do this 3 times. 1 fpdc in the next 4 posts.  ch 2, turn.

row 3-5: same as row 2. Keep following the same pattern, fpdc in each front post, and bpdc in each back post. change to color B

row 6-9: same as row 2-5, chain to color A

row 10 on: continue same way, changing colors every 4 rows.

you can vary stripe size by changing colors most or less often, until your cowl is the desired length. I ended up with 13 stripes total.

last row: sc in top of each post across, tie off. I'm sure you could also slip stitch across to make it more similar to the beginning chain row.

I ended up doing 52 rows of dc posts total, with the chain row on one end, and sc's at the last end.

Find or purchase buttons (I used 4, one for each front post set) that will fit snugly through the stitches in the cowl. The ones I used are about an inch wide, and they easily fit in and out of the stitches. Larger buttons will work too, but will take more effort to put in and out of the holes.


Care Instructions:
Machine wash warm, gentle cycle.
Machine dry, low heat, delicate cycle.

I personally would hand wash it and lay it flat to dry. I'm too afraid to put that much work in the washing machine, haha.


Enjoy! Please don't sell any of the items you make from this pattern, thanks!!

Let me know if you have any questions, and please show me what you have made. :D

Thursday 16 August 2012

Sizzix Vintaj

So, I work at michaels, in the jewelry department, and I looooove jewelry! I kind of liked jewelry before I worked in the jewelry section, but mainly I just wore the junky claires or ardenes jewelry. It is soooo much better when you make it yourself! Or buy quality hand made items from someone. It just feels so much better. :D

Anyways, we got a new machine at Michaels and it looks so cool, I'd love to have it if I had the room and could afford it, hahaha. It's called the Vintaj, by Sizzix. It cuts, etches, and embosses designs into metal plates, such as the one in the photo above.


Beautiful designs! So if any of you have this machine and have tried it on jewelry, please show me what you've done and how you like the machine. :)

Rachael

Friday 27 July 2012

Giant Yarn Blankets


These are so cool!! I found a picture on pinterest of one, but none of the pics on pinterest have working links. So I decided to go searching the web myself!

http://images4.ravelrycache.com/uploads/amaliachimera/110788046/DSC_0003_medium2.JPG


You can find more pics here


http://farm6.static.flickr.com/5009/5371304989_f3983393e6_z.jpg


Pattern for sale here


http://3.bp.blogspot.com/_oZXsTluFrEc/S-zSvXJ7ZUI/AAAAAAAAEfI/A-17KovDTUk/s1600/Screen+shot+2010-05-13+at+9.33.25+PM.png

It looks like she is crocheting with her hands, so cute!
Google sent me here for this pic, but when I went there, I couldnt find it, but it's too cute to not post!

Totally cute! I would love to make any of these! Very simple, you'd just need the right tools and supplies. :)

Rachael


Sunday 15 July 2012

Crochet Butterfly Tutorial

I found this wonderful tutorial on crochet butterflies and they turn out adorable!! The only thing is that the pattern is in UK terms, so I wanted to write it out in US terms--but here is the original tutorial


And these are the ones I just made:


I used embroidery thread/floss, and a 3.25mm / D hook.

Make a magic circle, or join a chain 6 together.


Round 1:

Make 4 groups of *3dc, 2ch, 3dc, 2ch*

Join with a slip stitch in the top of the first double crochet.

 Round 2:

Chain 3, then make (3dc, 2ch, 3dc) into the next 2ch gap
Make (3dc, 2ch, 3dc) in the following six 2ch gaps.
In the last gap make (3dc, 2ch, 2dc) and join with a slip stitch in the top of the 3ch – the 3ch you made at the beginning of the round, acts as a double crochet. 
You should have 8 groups of (3dc, 2ch, 3dc)


Round 3:

8dc in the following 2ch (the peak of the 'petal') then a slip stitch into the next gap (the space between the two 'petals'). Repeat this all the way around until you have eight groups of 8dc.

Join with a slip stitch into the last space. Fasten off.  Leave the tail long enough to sew the butterfly together and to sew on the antennae.

Antennae:

Make a chain in the length that you’d like your antennae to be (remember it will be folded in half). Fasten off and sew in the ends. Fold it in the middle.
Fold the flower shape you've made, in the middle, to create a butterfly shape. 
Now use the tail left over to sew up the middle of the butterfly and to attach the antennae.

and voila! You have a cute butterfly for your hair, clothes, accessories--sky's the limit! Please go to maries making's blog for the picture tutorial and UK terms!

Rachael


Saturday 14 July 2012

Cute Crochet Tutorials, Patterns


I was cruising pinterest and I found some adorable crochet patterns I wanted to share!


crochet slippers pattern
Super cute! I love the colours. (I found the tutorial here)


Love this hat too! (Tutorial found here)


Cuteasabutton1


Beautiful flower--this is going to become a hair clip! Made by mikey from thecrochetcrowd (tutorial)


These will become hair clips too! (tutorial)


I hope you like them! Let me know if you've tried any of them and how they worked for you!

Rachael